To clean makeup brushes properly, we recommend cleaning them after each and every use. This prevents bacteria buildup, prevents eyeshadow contamination, and ensures the color payoff is perfect every time. Makeup brushes can harbor up to 11 million bacterial colony-forming units, and a 2020 study by the American Society for Microbiology found Staphylococcus aureus in 34% of tested brushes. If cleaning after every use sounds unrealistic, the rest of this guide shows you how to get as close to it as your routine allows.
BeautySpark generates personalized eye makeup tutorials based on your color season, identified from a selfie photoWhy Dirty Brushes Wreck Your Makeup (and Your Skin)
Old pigment sitting in brush bristles mixes with fresh product every time you dip. The result is muddy, imprecise color that does not match what you picked from the pan. If you have ever wondered why your eyeshadow palette shades look different on the eye than in the pan, your brush might be the problem.
The hygiene side is worse. Studies testing cosmetic tools have found fungi and bacteria (including E. coli) in 70 to 90% of samples. Eyeshadow brushes rank highest for yeast colonies among all brush types. Around 44% of users rarely clean their brushes, and nearly 28% report skin problems they connect to contaminated tools. Breakouts, irritation, and eye infections can all trace back to a brush that has not been washed in weeks.
Clean brushes apply color more accurately and reduce your risk of breakouts caused by bacterial buildup.
Quick-Clean vs Deep-Clean: You Need Both
If cleaning fully after every use is not realistic for you, this two-method routine is how you stay close to it. Two methods, two different jobs. Neither replaces the other.
| Method | When to Use | Time | What It Removes |
|---|---|---|---|
| Quick-clean | After each use | 30 seconds per brush | Surface pigment and oils |
| Deep-clean | At least once a week | 2–3 minutes per brush | Embedded bacteria, oils, and product buildup |
Quick-cleaning handles day-to-day residue so your colors stay true. Deep-cleaning is the only way to get bacteria out of the bristles. Skipping either one leaves a gap. Quick-clean alone removes pigment but never reaches the bacteria embedded in the bristles, so they build up. Deep-clean alone kills bacteria but happens too rarely to stop old pigment muddying your color day to day. Each method covers what the other misses. This two-method split only matters if you are not deep-cleaning after every use. If you wash each brush fully every time (or rotate sets and wash the batch often enough), the deep-clean is the quick-clean. There is nothing left for a separate quick step to do.
A 30-second quick-clean handles day-to-day residue, but only a full soap-and-water wash eliminates the bacteria living deep in the bristles.
How to Quick-Clean Brushes Between Uses
Spritz a brush cleanser spray directly onto the bristles (two to three pumps). Swirl the brush on a clean paper towel or microfiber cloth until no color transfers. That is it. The spray is what makes this a clean rather than just moving pigment around, so do not skip it.
The whole process takes 30 seconds per brush and the bristles are dry enough to use again almost immediately.
Quick-cleaning prevents color contamination between uses, and since the bristles barely get wet, there is no drying wait.
How to Deep-Clean Brushes Step by Step
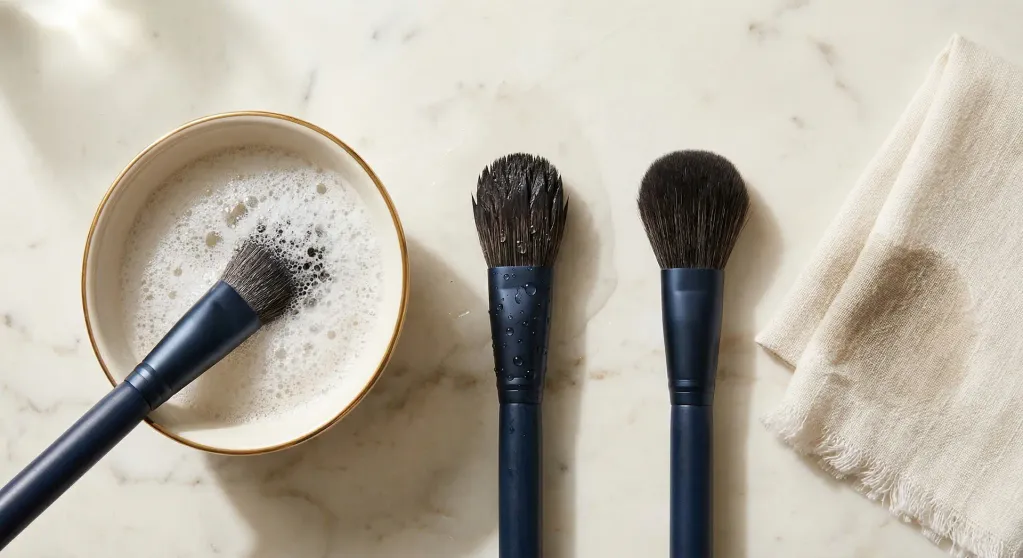
Step 1: Rinse bristles under lukewarm water
Hold the brush with bristle tips pointing down and run lukewarm water over them. Keep the water below the ferrule (the metal band connecting bristles to handle). Submerging the ferrule lets water seep inside and loosen the glue that holds everything together.
Step 2: Lather with gentle soap
Add a small drop of baby shampoo, castile soap, or brush cleanser to your palm or a silicone cleaning mat. Work the bristles into the soap using gentle circular motions.
Step 3: Swirl on a textured surface
If you have a silicone cleaning mat, swirl the bristles across the textured ridges. The texture works soap deeper into the bristles than your palm can. If you do not have a mat, your palm works fine for most brushes.
Step 4: Rinse until water runs clear
Hold tips down again and rinse under lukewarm water. Repeat the lather-and-rinse cycle if the water still shows color after the first round. Dense foundation brushes often need two passes.
Step 5: Reshape and lay flat to dry
Squeeze excess water out gently with a clean towel. Reshape the bristles to their original form with your fingers. Lay the brush flat on a towel with the bristles hanging off the counter edge so air circulates around them.
Five steps, two to three minutes per brush, and lukewarm water are all it takes to deep-clean any makeup brush without damaging the bristles or ferrule.
Discover Your Perfect Eye Look
Get your first AI-personalized look in under 5 minutes.


What Soap to Use (And What to Avoid)
Baby shampoo is the most reliable option. It is gentle enough for natural-hair brushes, strips oils without residue, and costs almost nothing. Castile soap (like Dr. Bronner's) works equally well, rinses clean, and is plant-based.
Dedicated brush cleansers are convenient but not necessary for deep cleans. They do the same job as baby shampoo at a higher price.
Gentle dish soap cuts grease effectively, which makes it useful for foundation and concealer brushes. Over time, though, it can dry out natural-hair bristles. If your brushes are synthetic, dish soap is fine for regular use.
Avoid harsh detergents, rubbing alcohol (it dries and cracks bristles), and bleach. None of these belong anywhere near a makeup brush.
Baby shampoo and castile soap both clean effectively without stripping natural bristles, and you already have one of them at home.
How to Dry Brushes Without Ruining Them
The one rule that matters: never dry a brush standing upright in a cup. Water travels down the bristles, pools inside the ferrule, and dissolves the adhesive holding the bristles to the handle. Over weeks, the bristles start shedding and the ferrule loosens.
Flat drying is the simplest option. Lay the brush on a towel with the bristles hanging off the edge of a counter or shelf so air reaches them from all sides.
Hanging tip-down is even better. A brush drying rack holds brushes upside down so gravity pulls water away from the ferrule. You can also wrap a rubber band around the brush handle and clip it to a hanger or towel bar, bristles pointing down.
Most brushes dry in 4 to 8 hours. Denser brushes (foundation, kabuki) may need overnight. Plan your deep-cleaning for the evening so everything is dry by morning.
Drying bristles-down or flat keeps water out of the ferrule, where moisture dissolves the glue holding your brush together.
How Often to Clean Each Brush Type
Quick-cleaning after every use is the standard for all brushes. What changes by brush type is how often you need a full deep-clean and when to replace the brush. Wet-product tools (foundation, concealer, sponges) need deep-cleaning most often, because moisture breeds bacteria faster than dry powder does.
| Brush Type | Quick-Clean | Deep-Clean |
|---|---|---|
| Eyeshadow brushes | After every use | At least weekly |
| Eyeliner brushes | After every use | At least weekly |
| Foundation/concealer brushes | After every use | Twice weekly |
| Powder/blush brushes | After every use | At least weekly |
| Lip brushes | After every use | At least weekly |
| Beauty sponges | After every use | Every 2–3 days |
Beauty sponges need the most frequent deep-cleaning because their porous structure traps moisture, oil, and bacteria faster than any bristle brush. If you use both brushes and sponges, see our guide on cream vs powder formulas for when each tool works best.
Every brush gets a quick-clean after each use, while wet-product tools and beauty sponges need the most frequent deep-cleaning.
Struggling to Clean Daily? Keep a Few Sets
If washing your brushes after every use feels like too much, own two or three sets of the ones you use most. Reach for a fresh brush each day and set the used one aside. Then wash the whole batch together in one go. You still apply with a clean brush every time, and you only face the sink once, not every day. A dry, ready brush is always waiting, so the drying wait never leaves you stuck.
Owning a few sets of your core brushes lets you apply with a clean brush daily while batch-washing just once a week.
Signs It Is Time to Replace a Brush
Cleaning can only do so much. Eventually a brush is done.
- Shedding bristles during application. A few loose hairs after washing is normal. Bristles falling out while you blend is not.
- Permanently splayed bristles. If the brush will not hold its shape after washing and reshaping, the bristles have lost their structure.
- Persistent odor after deep-cleaning. Smell that survives a thorough soap wash means bacteria has colonized the ferrule or bristle core.
- Loose ferrule. If the metal band wobbles or separates from the handle, the glue is gone.
- Scratchy texture on skin. Bristles that feel rough even after conditioning with soap have hardened past the point of recovery.
If a brush sheds, smells, or scratches after a thorough wash, it has reached the end of its useful life and no amount of cleaning will restore it.
Frequently Asked Questions
Discover Your Perfect Eye Look
Get your first AI-personalized look in under 5 minutes.